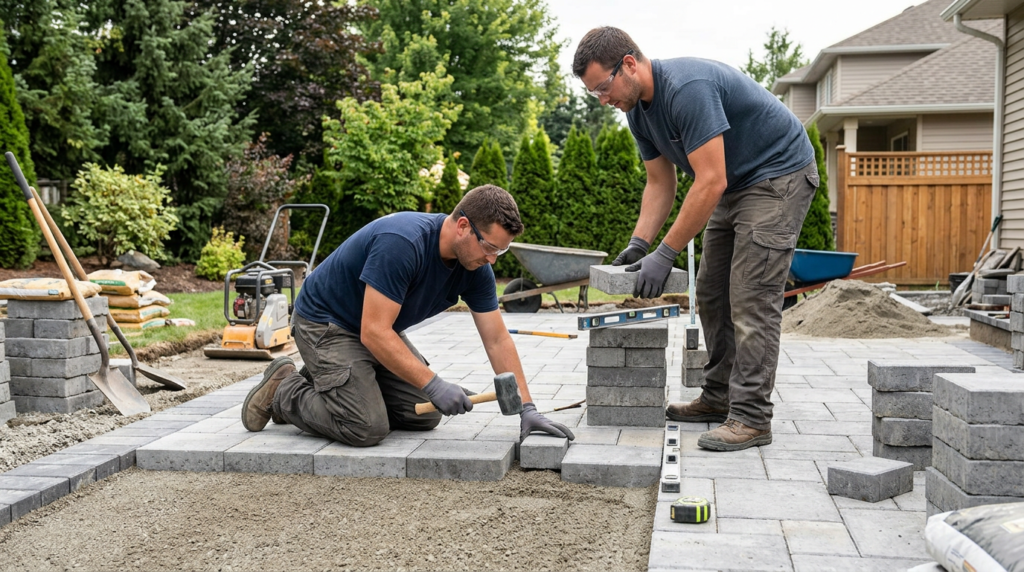
Quick answer: A hardscape installation typically includes site prep, base construction, laying pavers/stone/concrete, edge restraints, jointing, and final grading so water drains away from your home. Expect noise, deliveries, and limited access to the work area for several days to a few weeks, depending on size and weather. A good contractor will confirm layout, drainage plan, and material details before work starts and again before final cleanup.
The Usual Steps From Start to Finish
A typical hardscape installation starts with a layout walk-through where the crew confirms elevations, slopes, and the exact footprint. This is the moment to re-check door clearances, gate widths, and where downspouts discharge, because small changes are easiest before digging begins.
Next comes excavation and base prep. Soil is removed to the planned depth, then a compacted aggregate base is built in lifts (layers) to reduce settling. For pavers, edge restraints are installed to keep the field from spreading, then bedding material is screeded and the pavers or stone are set. Finally, joints are filled (often with polymeric sand for pavers), surfaces are compacted, and transitions to lawn, mulch beds, or existing concrete are graded so water moves away from structures.
For poured concrete, the sequence shifts: forms, reinforcement, placement, finishing, and curing. Curing time can limit foot traffic for a few days and vehicle traffic longer, depending on mix and conditions.
Timeline, Access, and What Disruption Looks Like
Many patio or walkway projects take several working days, while larger combinations (patio plus retaining wall plus steps) can stretch into a couple of weeks. Weather matters: rain can pause excavation and base work, and extreme heat or cold can affect concrete placement and curing.
Plan for a staging area. Materials often arrive on pallets, and the crew needs room for a skid steer or plate compactor. Expect temporary loss of access to parts of the yard, and keep pets and kids away from open excavations and moving equipment. If the project affects a driveway or main entry, confirm the daily plan so you know when you can park, walk through, or use alternate doors.
Red Flags and Quality Checks You Can Do
Drainage is the biggest long-term performance issue. Surfaces should generally slope away from the house, and water should not be directed toward the foundation or into low spots that stay soggy. Ask where water will go during a heavy rain and how the crew is controlling runoff at edges and transitions.
Base thickness and compaction are the next common failure points. Signs of shortcuts include a base that looks thin for the soil conditions, soft spots that “pump” underfoot, or pavers being laid before the base is fully compacted. For pavers, edge restraints should be continuous and well-anchored; without them, the field can creep and joints can open.
For retaining walls, look for a properly prepared footing area, drainage stone behind the wall, and a way for water to relieve pressure (such as a drain outlet). Bulging, leaning, or separating blocks later on often trace back to poor drainage or inadequate base prep.
How to Prepare and What to Ask Before Work Starts
Mark sprinklers, invisible fence lines, and any low-voltage lighting routes before excavation. If you have septic components, a well head, or known utility runs, point them out early. Contractors typically call for utility locates, but private lines on your property may still need your help to identify.
Ask for specifics in plain language: the planned slope direction, base material type, how edges will be restrained, and what the final transition to lawn or beds will look like. Also confirm the care instructions—polymeric sand and new concrete both have do’s and don’ts during the first days after completion.
If you want help planning a layout that drains well and holds up season after season, White Oak Tree Company can walk you through options and the practical trade-offs for your yard.